Taking Forensic Disk Images from the OVH Cloud
This article explains how a disk image can be taken from a virtual machine running on the public cloud. The acquired disk image can then be used with offline forensic tools like Autopsy and Encase.
When to acquire a forensic image
Cybercriminals often abuse services in the public cloud because of the low cost and the relaxed vetting process around new user account registration. For example, criminals rely on virtual machines to host command-and-control services, malware and ransomware campaigns, and distribute phishing emails. A forensic image of these VMs may reveal who and how was involved in the criminal activities.
The second reason for taking an image is data breaches. Businesses rely on virtual machines for running public-facing services on the internet. Unfortunately, these services can be a victim of hacking, and the virtual machine becomes the source of a data breach. When this happens, IT practitioners can retrieve crucial evidence from the virtual machine to determine the root cause of the security breach. The forensic analysis of the compromised virtual instance can also reveal what the perpetrators did on the VM as well as the scale of the data breach.
The following sections will demonstrate how IT practitioners can acquire disk images forensically from the OVH public cloud environment.


Getting the CLI tools ready
The digital device we will analyse is a virtual machine running at the cloud provider called OVH. Why OVH? In a 2021 threat analysis report from Spamhaus, OVH is ranked as the fourth most popular hosting provider amongst botnet operators in Q2 2021. The same paper claims that other big-name cloud providers, such as Microsoft Azure, Hetzner and DigitalOcean, are also a hotbed of criminal activity.
The OVH public cloud service relies on the OpenStack cloud computing platform therefore, we will use the standard OpenStack CLI tools in the forensic acquisition process. To install the command-client client, please refer to the instructions at OpenStack.
Once the CLI client is installed, sign in to the OVH control panel via the web browser to generate an API token.
Retrieving an API token
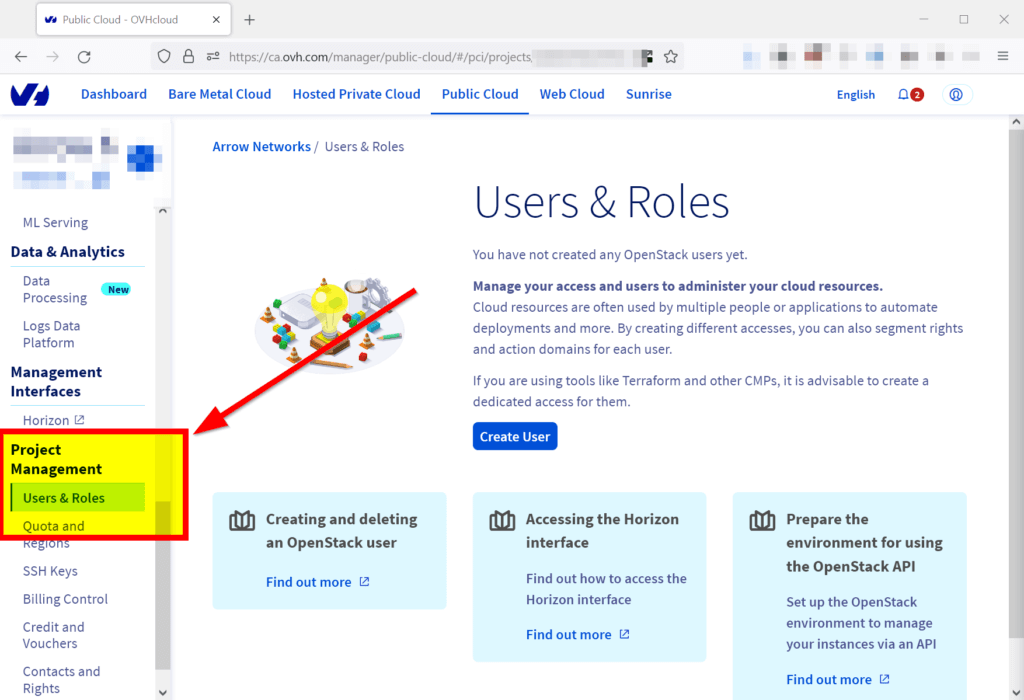
OVH divides up its customer accounts by logical groups called ‘projects’. Each project can feature virtual machines, virtual networks, block storage devices and other cloud services. To generate an API token for the acquisition, we need to open the appropriate OVH project running our web server. Next, sign in to the OVH console, choose the right public cloud project, and click on the Users & Roles on the left-hand side under the Project Management section.
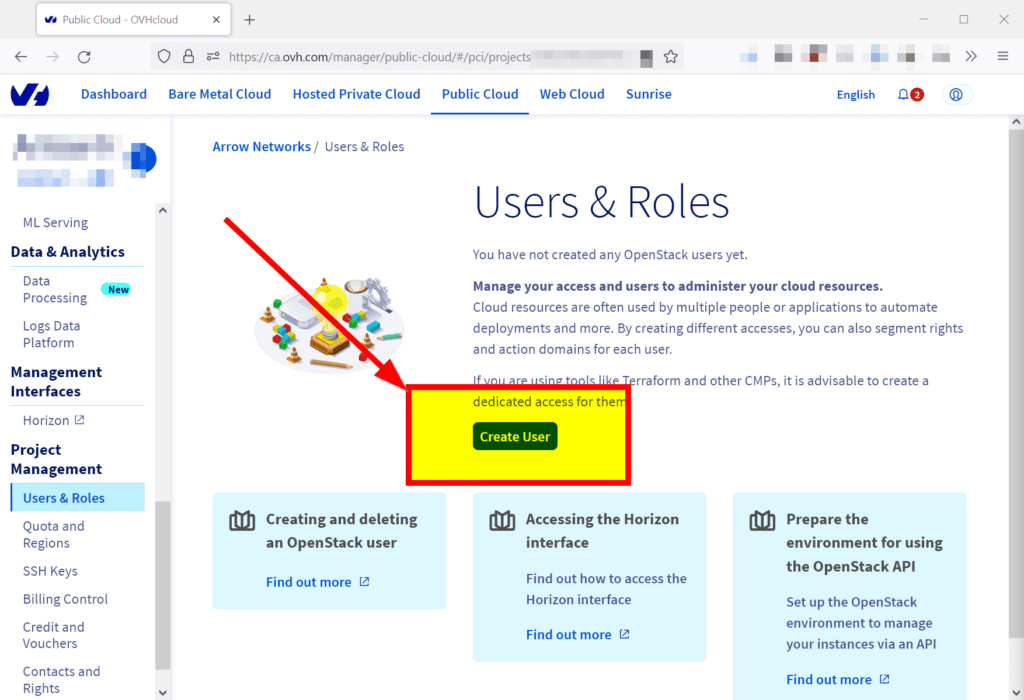
On the new page, click on the Create User button.
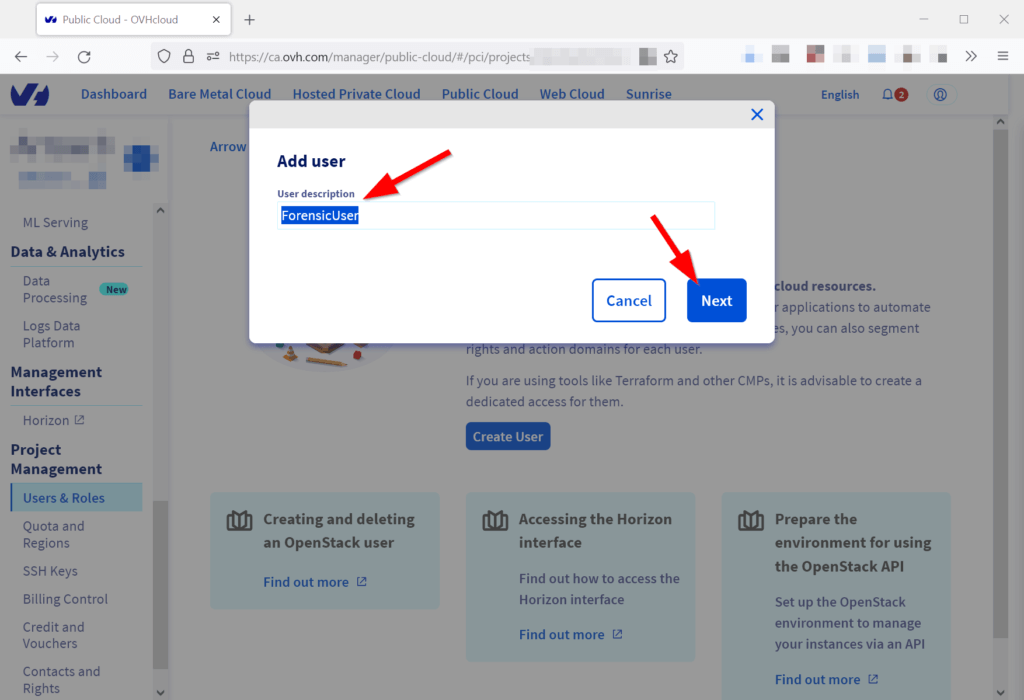
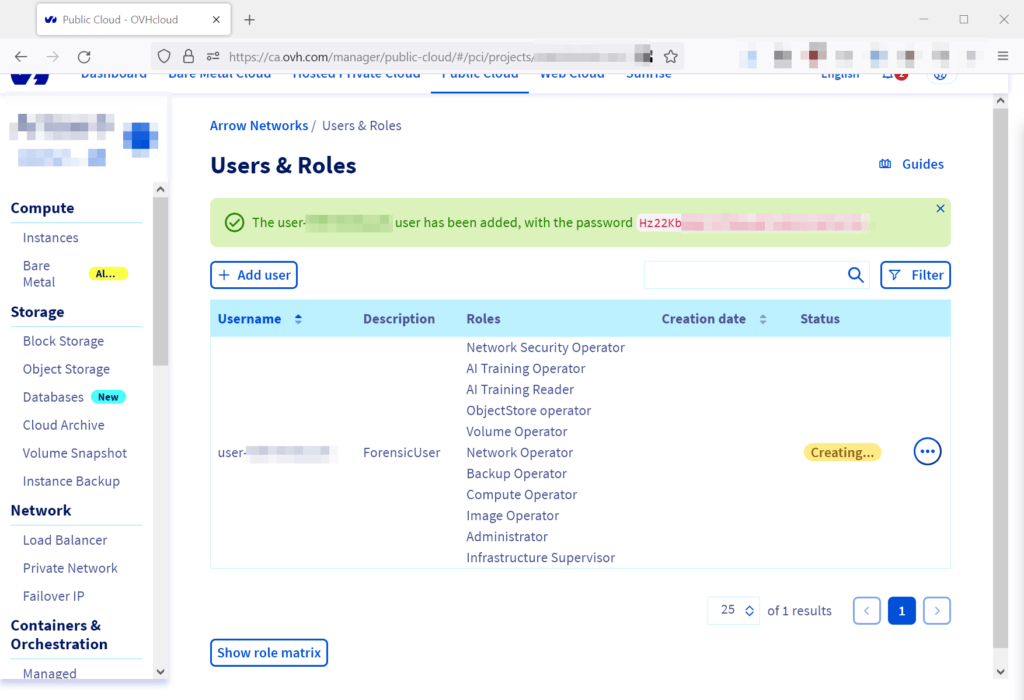
Enter a descriptive name for the new role (e.g. ForensicUser) and click Next.
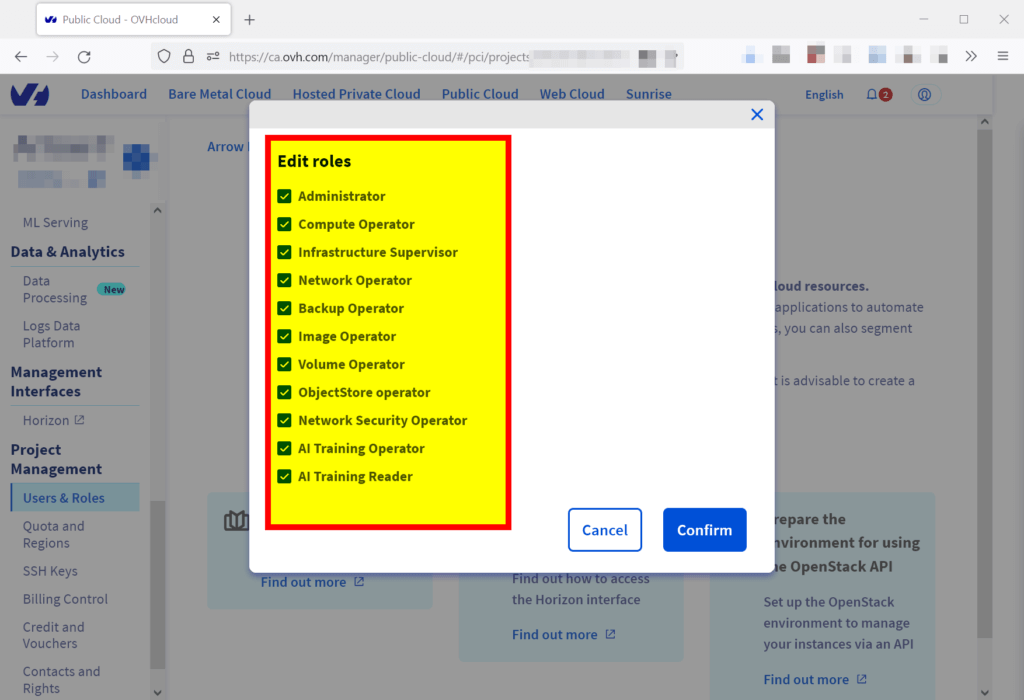
In the next popup window, pick all roles and hit Confirm.
After a few seconds, the password of the service user should be displayed at the top of the web page. Save this password for later.
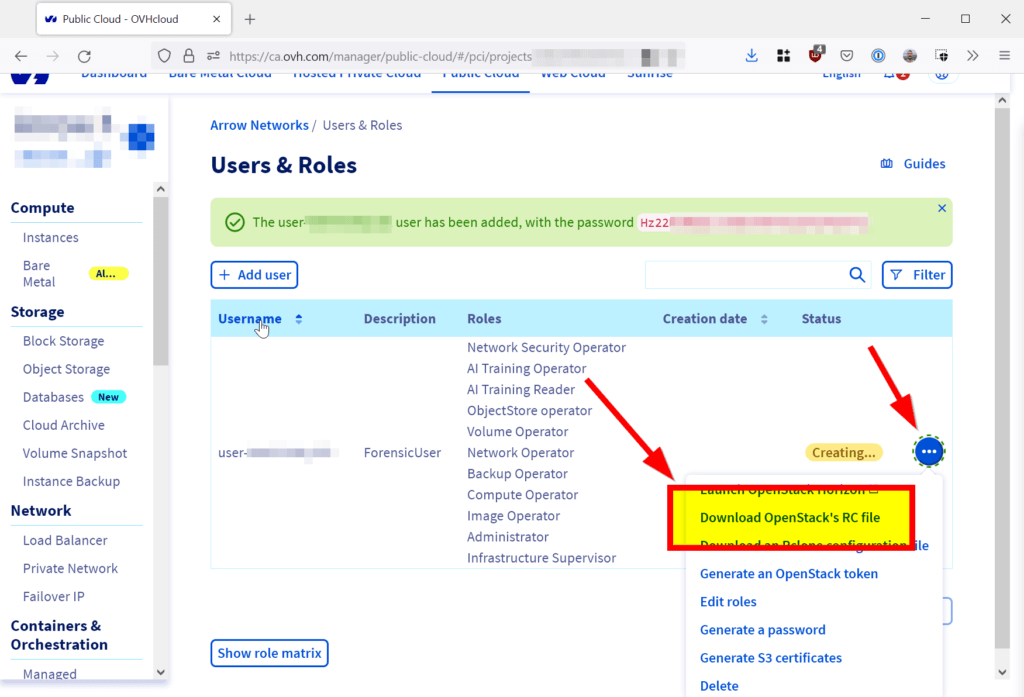
Click on the three dots on the right-hand side and select the Download OpenStack’s RC file option. The name of this configuration file should be openrc.sh.
Testing the connection
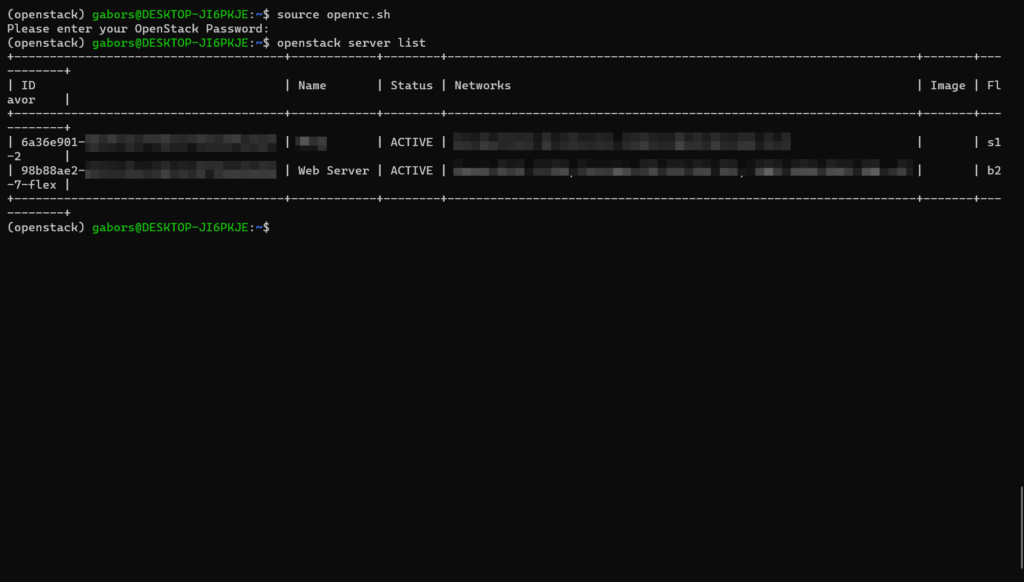
Run source openrc.sh to initialise the OpenStack command-line client.
# source ./openrc.sh
The configuration script should ask for the password of the API user we created earlier. The following command should display all virtual machines running under the OVH project if everything is working fine.
# openstack server list
Forensic image acquisition from OVH
Once the OpenStack client is running correctly, we can move on to the forensic image acquisition.
The first step is to create a snapshot image from the virtual machine. Assuming that the virtual machine is called Web Server, the following OpenStack command should create a snapshot:
# openstack server image create --name WebServer-bkp01 "Web Server"
Depending on the size of the VM, the process can take 10-15 minutes to finish. We can follow the snapshotting process with the following command:
# openstack image list --private
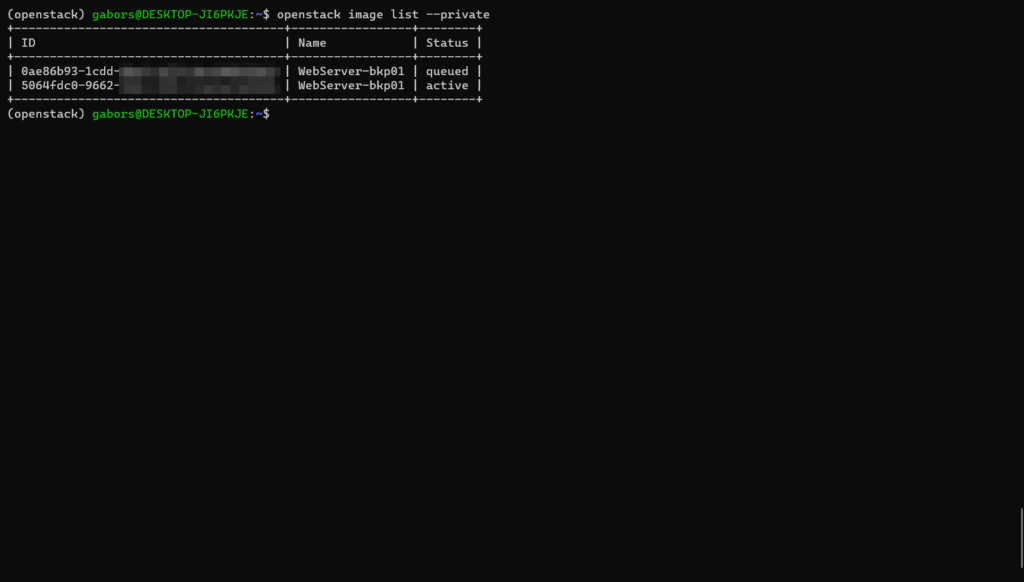
If the snapshot process is still running, the status of the process is queued. Once the process is complete, the status should change to active.
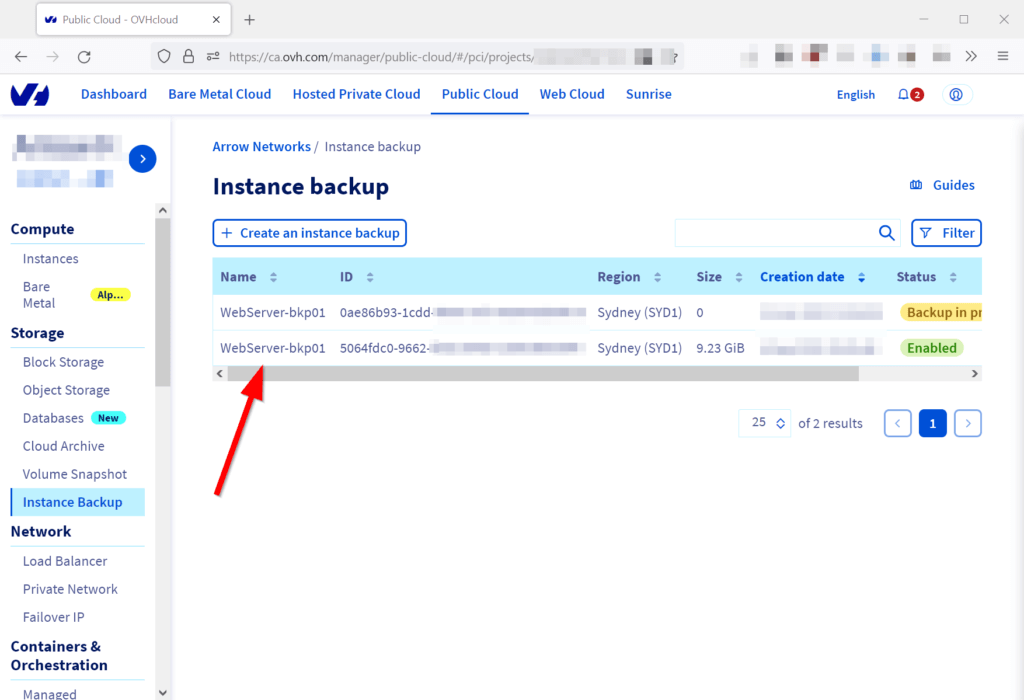
The snapshots can also be observed on the OVH console under the Storage –> Image Backup page.
Finally, the snapshot of the virtual machine can be transferred from the public cloud to the local machine with the following command:
# openstack image save --file ovh-webserver.qcow2 <snapshot_id>
Once the file transfer is ready, the image of the virtual machine should be available as a file named ‘ovh-webserver.qcow’. Unfortunately, there is no progress bar to follow the process, and the download speed is relatively slow.
The virtual machine snapshot file format is qcow2, which is the standard file format of QEMU, an open-source virtualisation software. Therefore, to load this image file to the Autopsy, we need to convert the file from qcow2 to raw image format.
# qemu-img convert -f qcow2 ovh-webserver.qcow2 -O raw ovh-webserver.raw
The raw image can be loaded into Autopsy and other traditional forensic toolkits for forensic analysis.
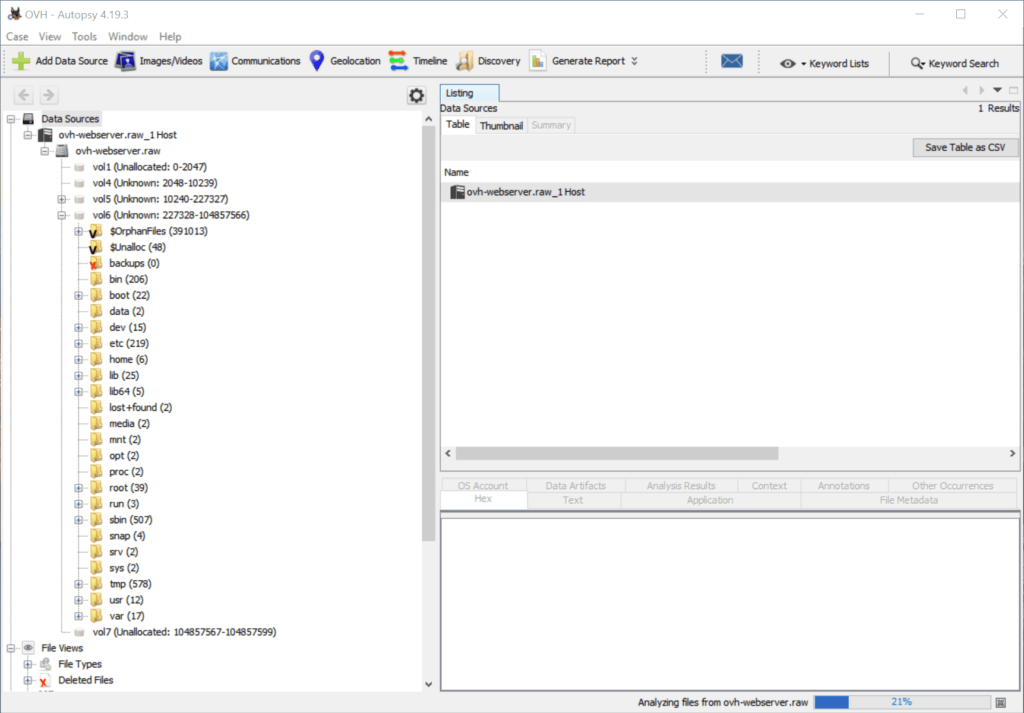
Image acquisition from other cloud providers
Big-name public cloud providers like AWS and Azure also allow the acquisition of virtual machine images on a self-service basis. Please refer to the relevant documentation at Amazon and Microsoft for the details.
Other public cloud providers may not allow this approach to image acquisition due to the platform’s technical limitations. For example, Linode recommends using the combination of ‘dd’ and SSH for the disk acquisition process. One of the drawbacks of this on-the-fly image acquisition approach is that the resulting forensic disk image is not an accurate and consistent snapshot of the virtual machine running during the acquisition process. The inconsistency results from the virtual machine running during the image acquisition process, because the OS may alter or delete files, metadata and other crucial information during the process.
Alternatively, it is worthwhile engaging the cloud platform’s technical support team. The support engineers should be able to get around any technical limitations as they have direct access to the hypervisor with their internal tools and services; thus, the support team should be able to generate consistent snapshots of the virtual machines.
*** This is a Security Bloggers Network syndicated blog from Rainbow and Unicorn authored by Gabor. Read the original post at: https://blog.gaborszathmari.me/taking-forensic-disk-image-ovh-cloud/